Blue Peter Dinghy - Adjustable Mast Step Mk1

In my previous post, I mentioned trying to identify the correct mast cup location for designed COE on the sail relative to CLR of the hull to ensure best sailing.
I did fix the mast step at where I thought it needed to be, but, having made (in retrospect while removing it) a really good job of anchoring it in place, I have opted to make an adjustable cup holder.
There is very little movement possible on the mast support gate, but I've been able to move this vertically up by about 12mm. This has allowed me that space to strengthen the base of the mast step and simultaneously add in some extra material.
I wasn't sure what I could do, so I opted to melt a few milk bottles (HDPE) to form an HDPE sheet of circa 4.5mm thick. This was an experience, using the oven and rather laborious, but, got the job done. HDPE sheets aren't cheap so I think I was right to do with when I was guessing. I had tried to design something using a 3D CAD program, but wasn't sure how to make it bite when in the chosen position.
Here's a few photos showing the process


The issue I've found previously is that the HDPE deforms during cooling. To avoid this, it needs pressing. I used a few stacks of washers to get the desired gap between two sheets of wood, sandwiched these between another two sheets of wood (this wood is made up of glued lathes and they can break apart) before clamping around the edges.
To make the appropriate shape, I melted the plastic in an approximately correct sized pot before taking out, rolling and rolling some more between two sheets of baking paper. Once the size and thickness was about right and the plastic fully congealed, it went in the mould.
I didn't take any photos of the resultant sheet, but if you roll out icing you get a similar effect - flat but jagged edges.
The plastic was taken to the shed where I milled the shapes using a combination of tenon saw, router, drill, and files as appropriate.
The result is as follows

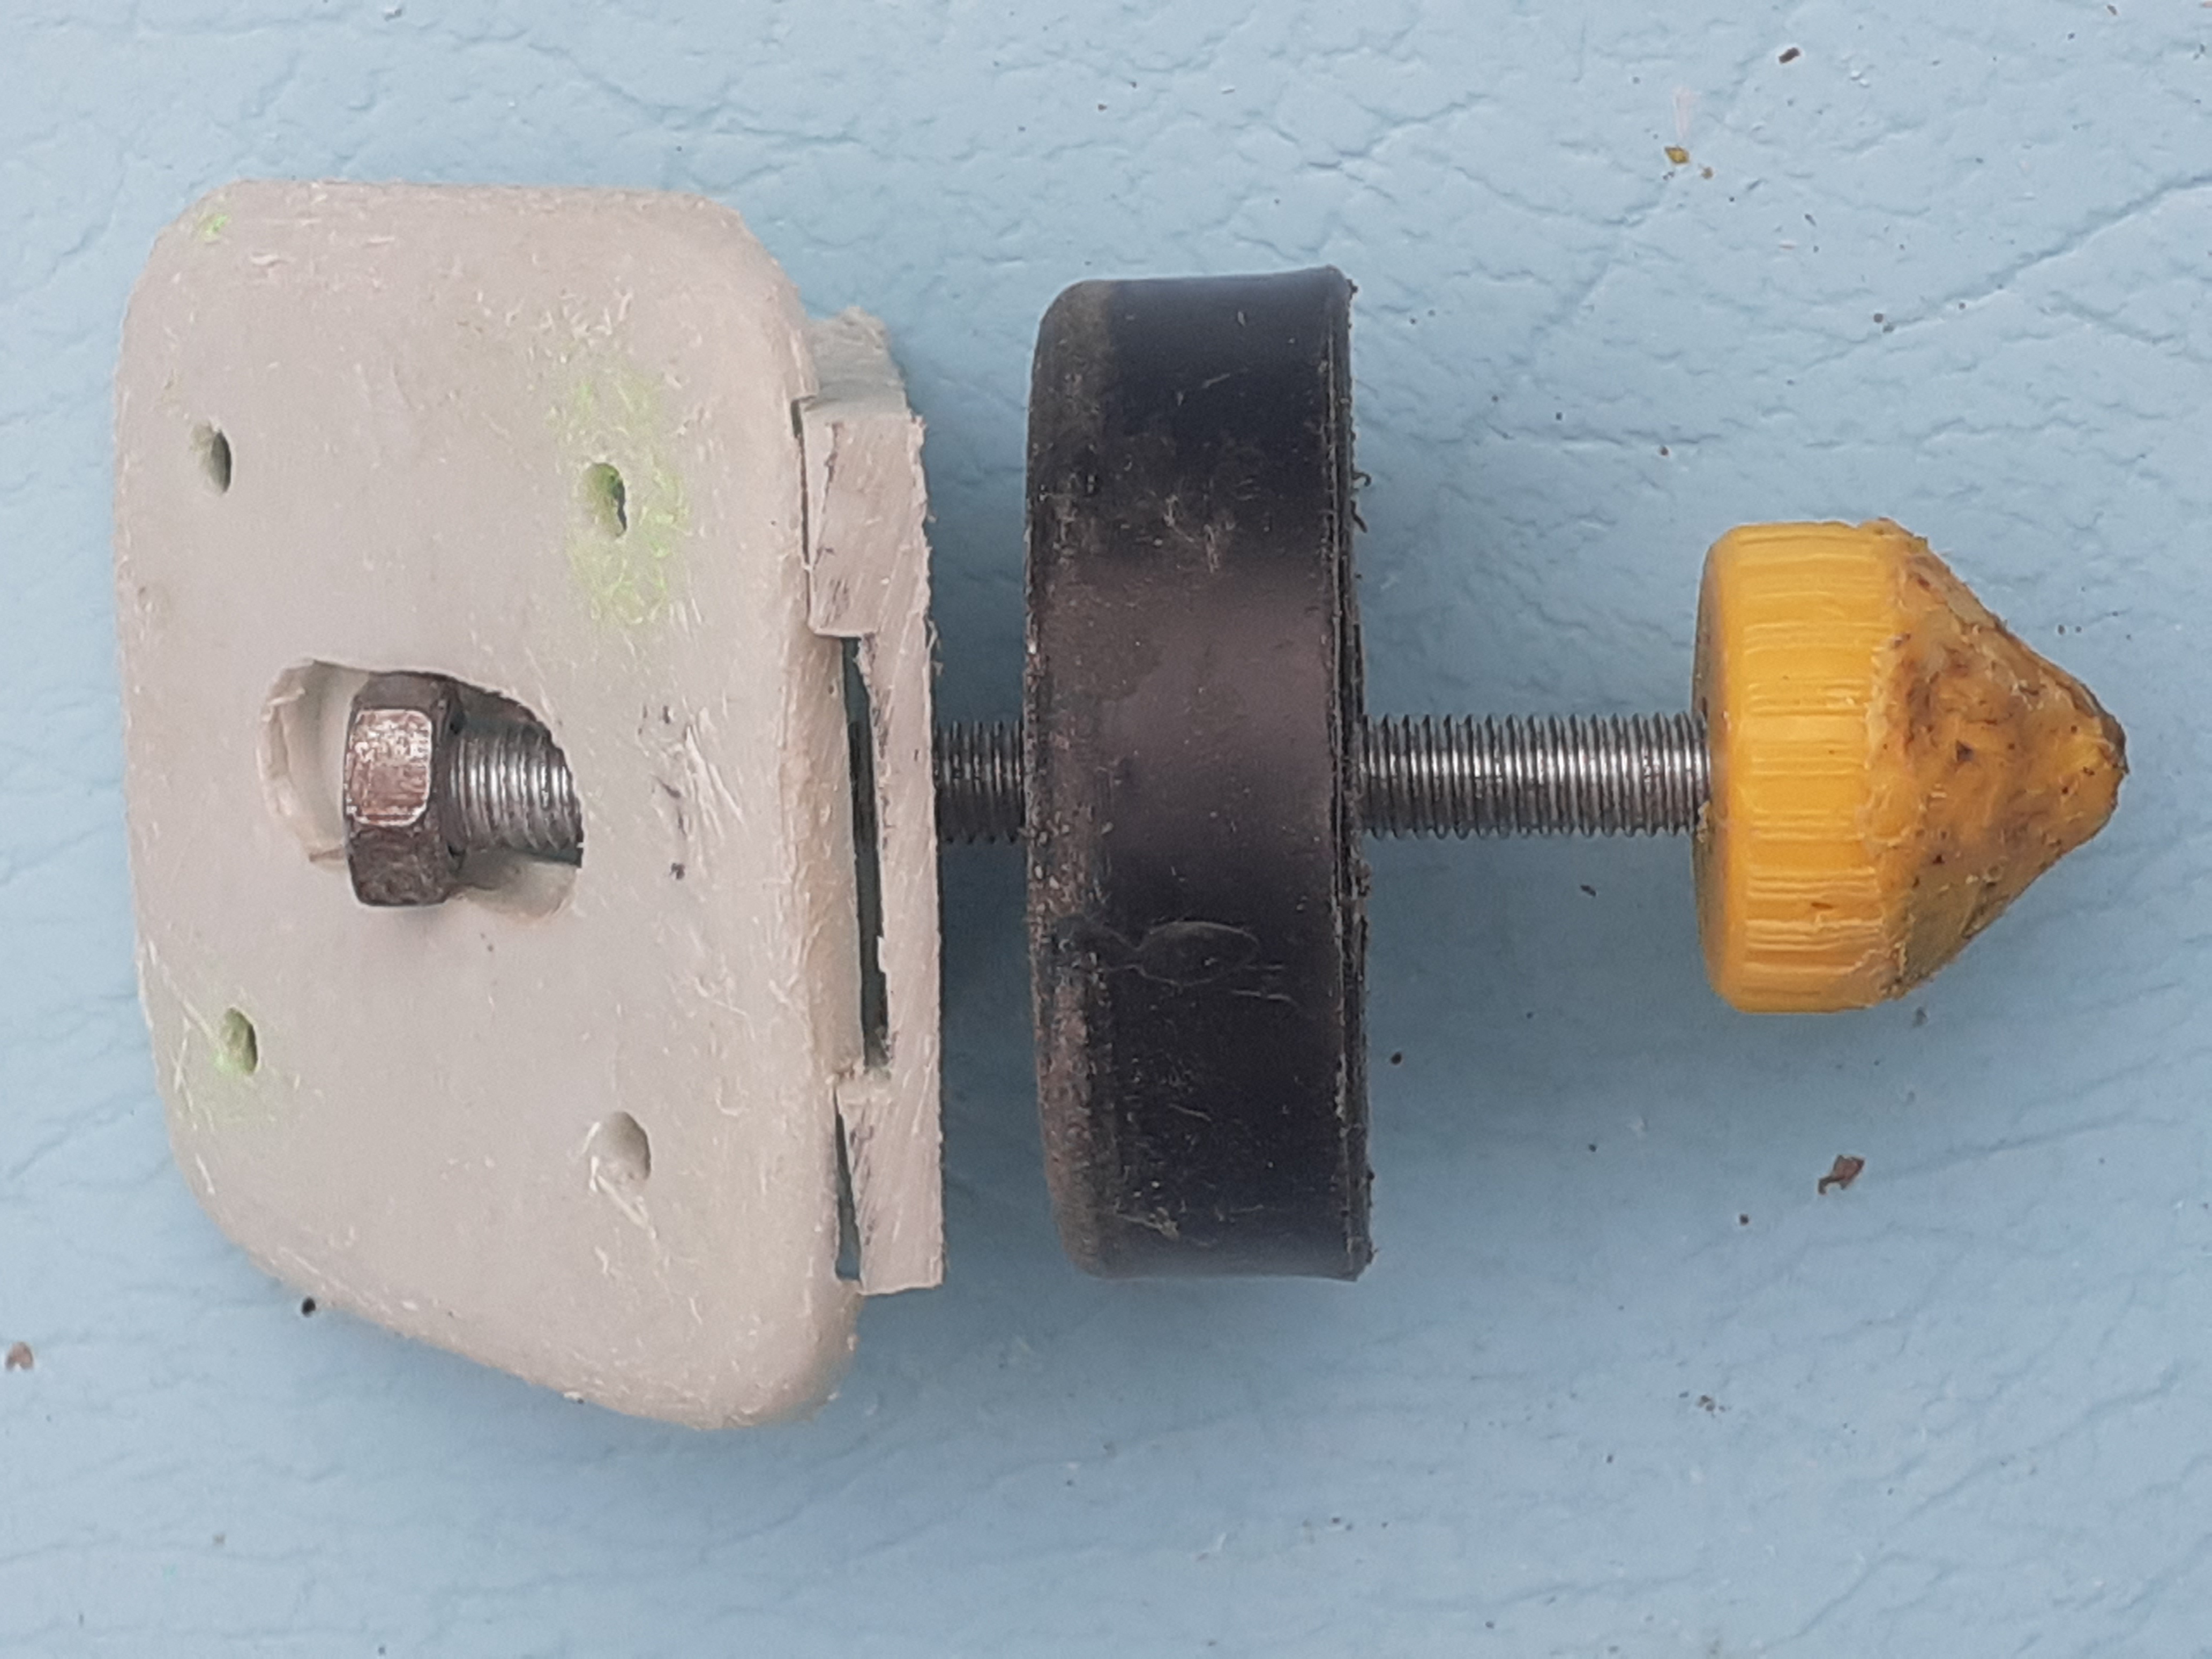
- The two pieces of HDPE slide neatly on the milled rails.
- The bolt (in the photos it's a nut) neatly fits inside a slot on the back of the base
- The mast cup (standard Topper design I believe) now has a nut plastic welded into the back thus it can be screwed down tight to hold the HDPE pieces from movement
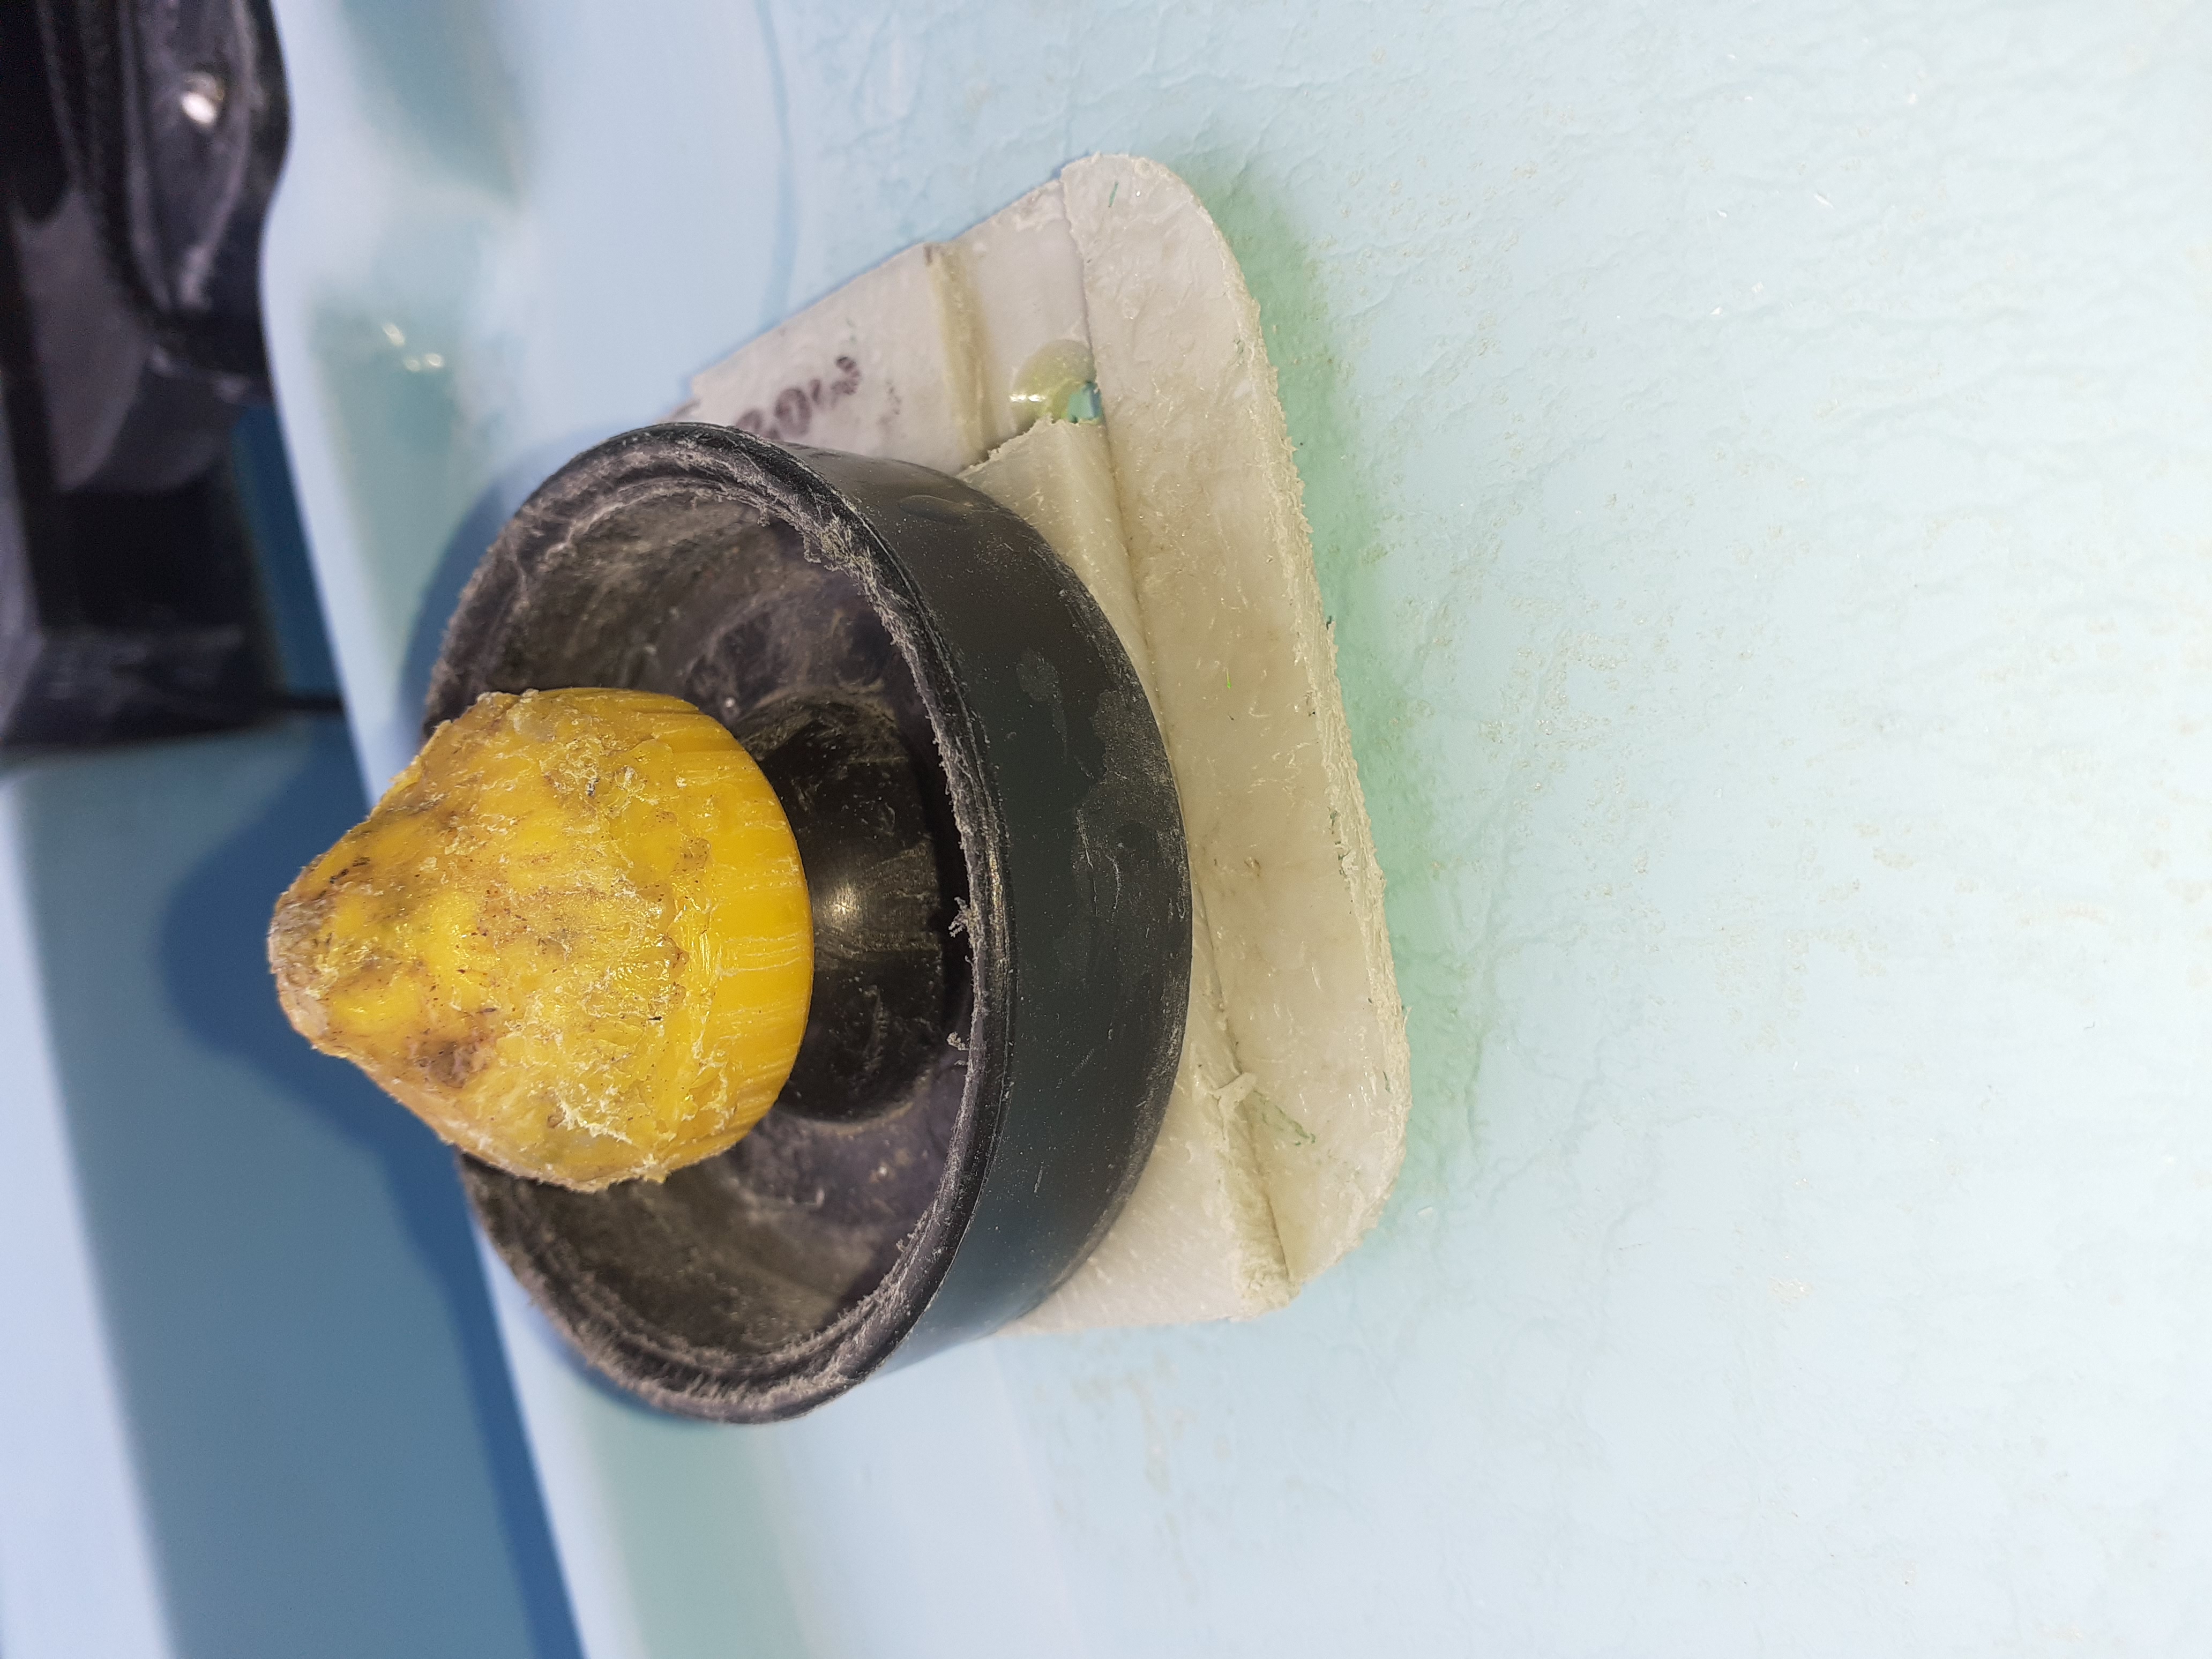
- The yellow domed cap with embedded nut sits above the mast step. The point of this is that a second nut holds the mast step itself from turning loose. The dome is so the mast glances off this rather than exerting downward force on the end of the bolt (and thus onto the hull below)
It was tricky to get the HDPE centred so the mast would be upright laterally, but I think I managed it. When the bolts arrive, I'll know for sure.
Originally the HDPE base was to be fixed using bolts and jack nuts, but after drilling the exploratory holes shown, there was found to be insufficient space, so I've switched to rivet nuts. These aren't going to hold so well, but hopefully given the minimal upward force trying to pull them from the fibreglass, epoxying them in place should be okay.
On the question of the recycled HDPE, I have done a test to see how brittle it is. I think it's pretty flexible. Here's a short video clip where I destructively test an offcut from the sheet I used.
After creating the adjustment component for the mast step, I needed to raise the mast gate. To do this, I added penny washers in a growing stack until the mast fitted again, then made a shim from polypropylene. I don't have any thick polypropylene, so I used the base for our old kitchen bin (about 3mm), laminating several layers together from pieces with the aid of a heat gun and my bench vice.


The mast has now been tested with everything dry fitted and works nicely. In a couple of days I'll have the bolts arrive and be able to fix the mast cup in position, though I think I'll gel-coat before adding the rivet nuts permanently.
Having had the bolts arrive, I've now got a picture of the item complete. I'm going to fit it with the bolts I ordered, but I realise in retrospect that Philips style heads aren't ideal - if dirt gets in the step, it would be easier to scrape it out of slotted heads.... next time!
Around this time, I used a vacuum to remove all dust from the mast step and saw much cracking below the mast step itself.... which I removed as much as I could of using the Dremel. It appeared to be pure epoxy used to glue the two hull pieces together and had fractured over the years at some point. I mixed up a solid amount of epoxy and prepared a large quantity of matting chopped into smallish pieces, then poured some in, laid some matting, repeated until the hole was full. Looking through the access hatch, the resin ran down the keel line a bit, but not much considering what went in, so I am fairly confident of a solid joint again between the hulls, but more importantly a solid base under the mast. I'm considering installing a new access hatch at the bow which will allow me to add some fibreglass bridges between the bottom hull and the mast step, but hope to avoid the whole job if possible.
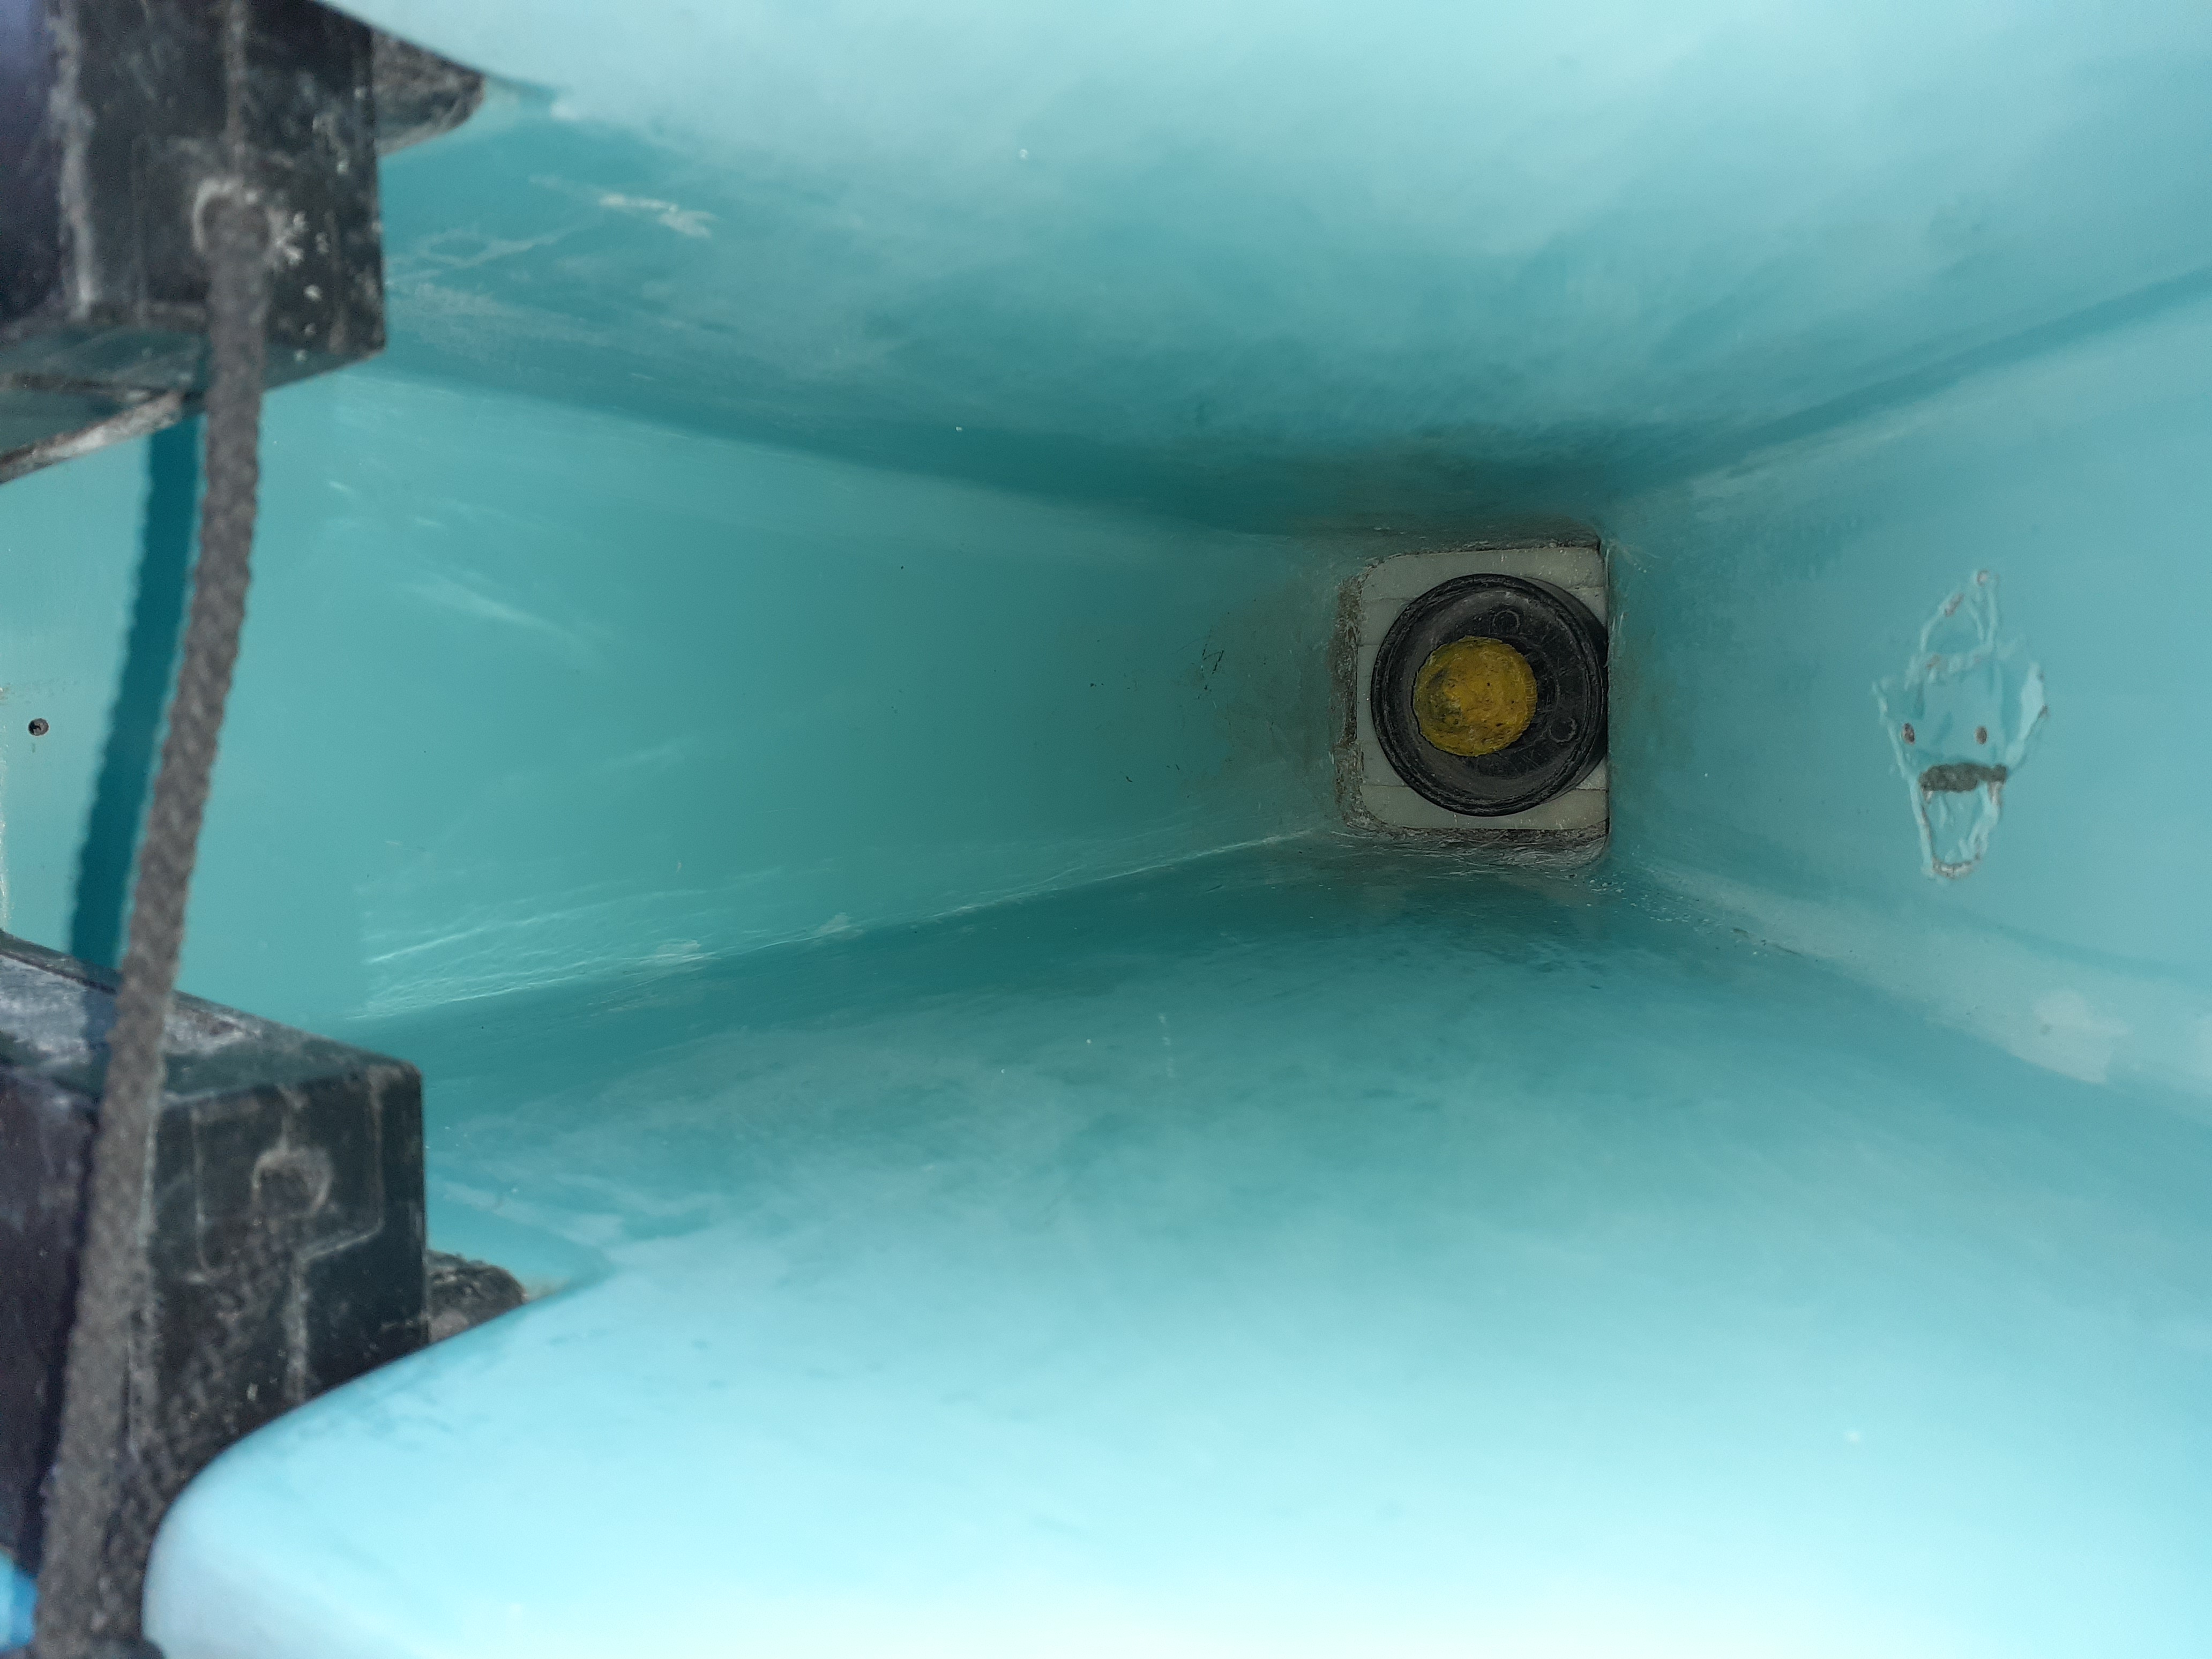
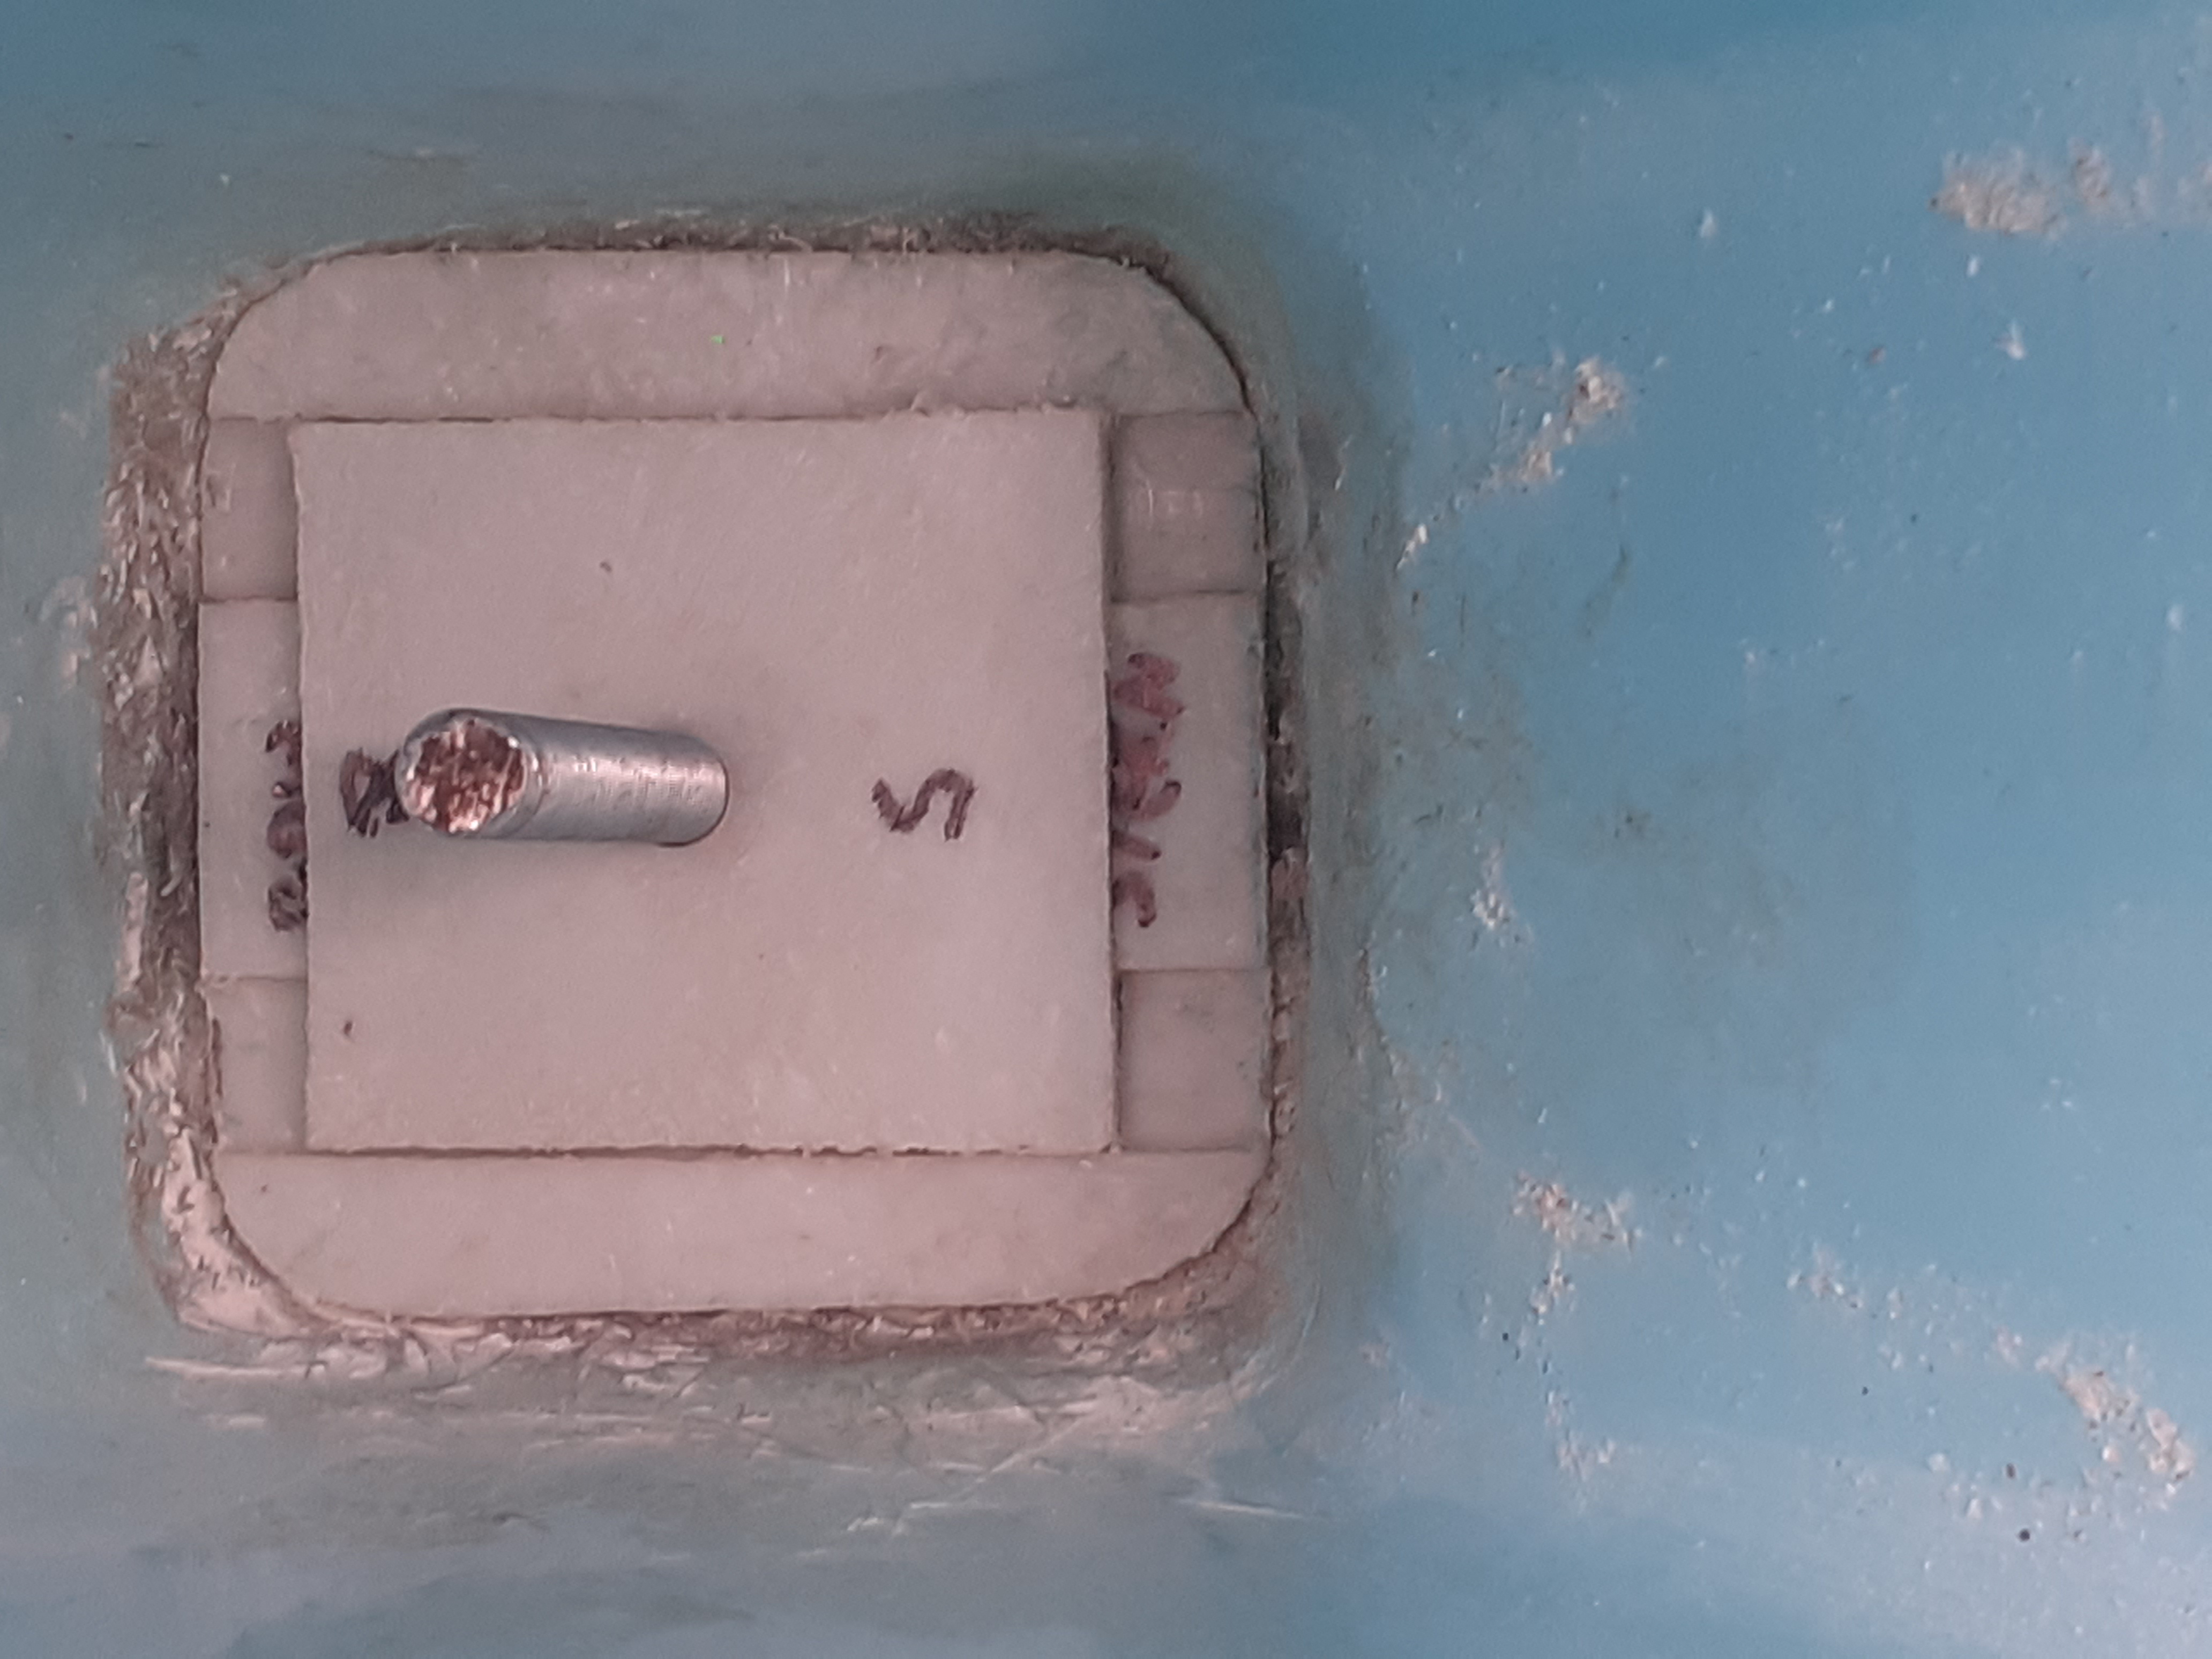
Here's a few pictures taken of the interior of the hull.


I opted to epoxy 4 rivet nuts into the hull. I thought these would work well, squeezing into the hull as the bolts were tightened. Worst case, if they break loose, nothing much can happen as they are over 1cm long and I hope will prevent any wobble between them. Time will tell if I should have just epoxied a stack of 2 or 3 nuts instead... Here's the mast step cup bolted in place. For such a small amount of movement, you'd not believe the visibly obvious rake change in the mast!
Ironically, having fixed the lateral movement, I'm now wondering if it shouldn't be adjustable laterally by a couple of milimeters since I may be wrong, but I think the mast could be off true laterally by a degree. ARGH!!! The easiest way may be to just remake the base with bolt holes from centre by the correction.
On testing, the yellow domed nut shield works really well, both for deflecting the mast as it is inserted and providing extra traction and leverage necessary to manually tighten the contraption by finger (the cup itself also contains a nut, so the two act as a locking pair).