Blue Peter Dinghy - Fibreglass work

Today I started the fibreglass repairs.
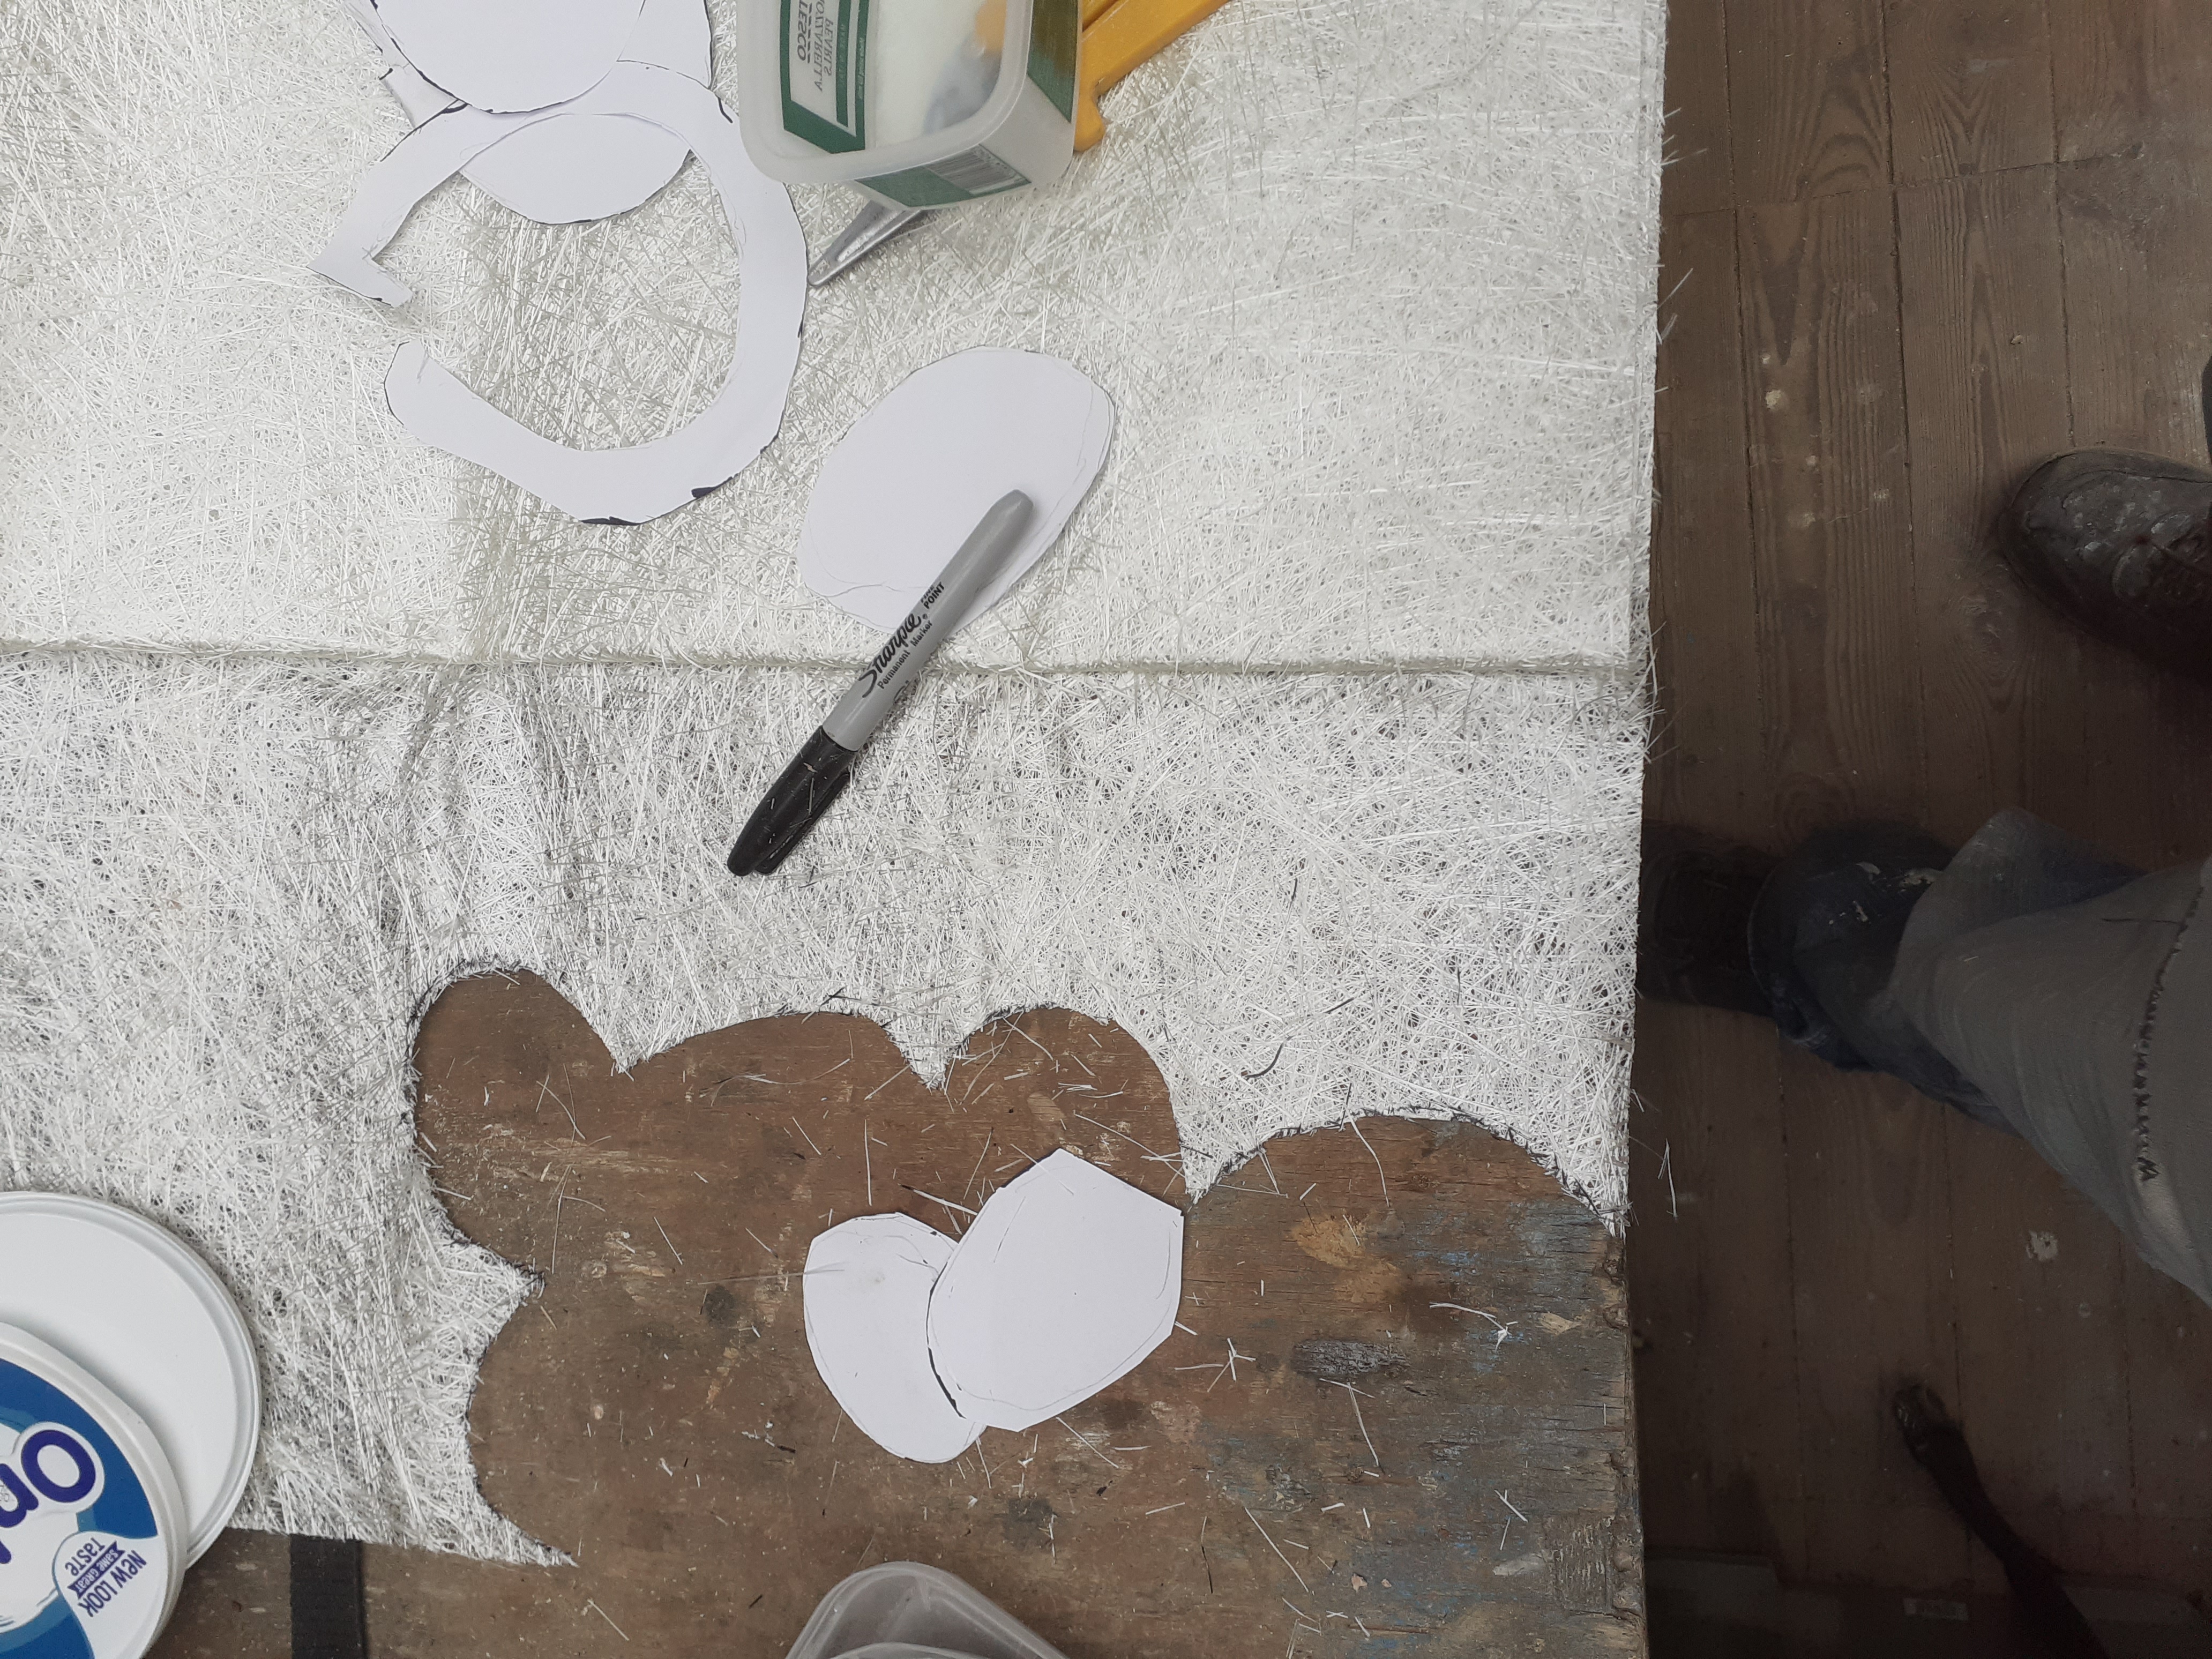
I've never done it before, so I was rather apprehensive. First off I cut a shape out on paper to fill my largest hole. Next I drew around that on some fibreglass matting with a sharpie, cut it out and held it in place. I then added the paper back on top and drew a smaller shape that filled the deepest area again. I repeated this process until the hole looked more level (less a couple of mm) than the gelcoat surrounding.
The hole was then wiped with an acetone soaked tissue to clean off any oils
Next I mixed up a small quantity of resin. I had no idea how much to make so I put something like 30ml in small pot and added 5 or 6 drops of catalyst. This was stirred well but gently (to avoid adding bubbles) using a lolly stick and then a little with my old paint brush I was to use to apply the mix. In retrospect, I should have added a couple more drops of catalyst I think, it is setting, but remained workable (just) for an hour at a guess - forgot to check the time when I started! DOH!
As it turned out, the quantity I made up of the resin was more than needed for this patch, so I had to cut some shape for a couple of other areas of work as I went. If I did it again, I've have all the matting cut ready so I didn't have to pause. I was lucky the resin didn't go off on me, but it's cool today.
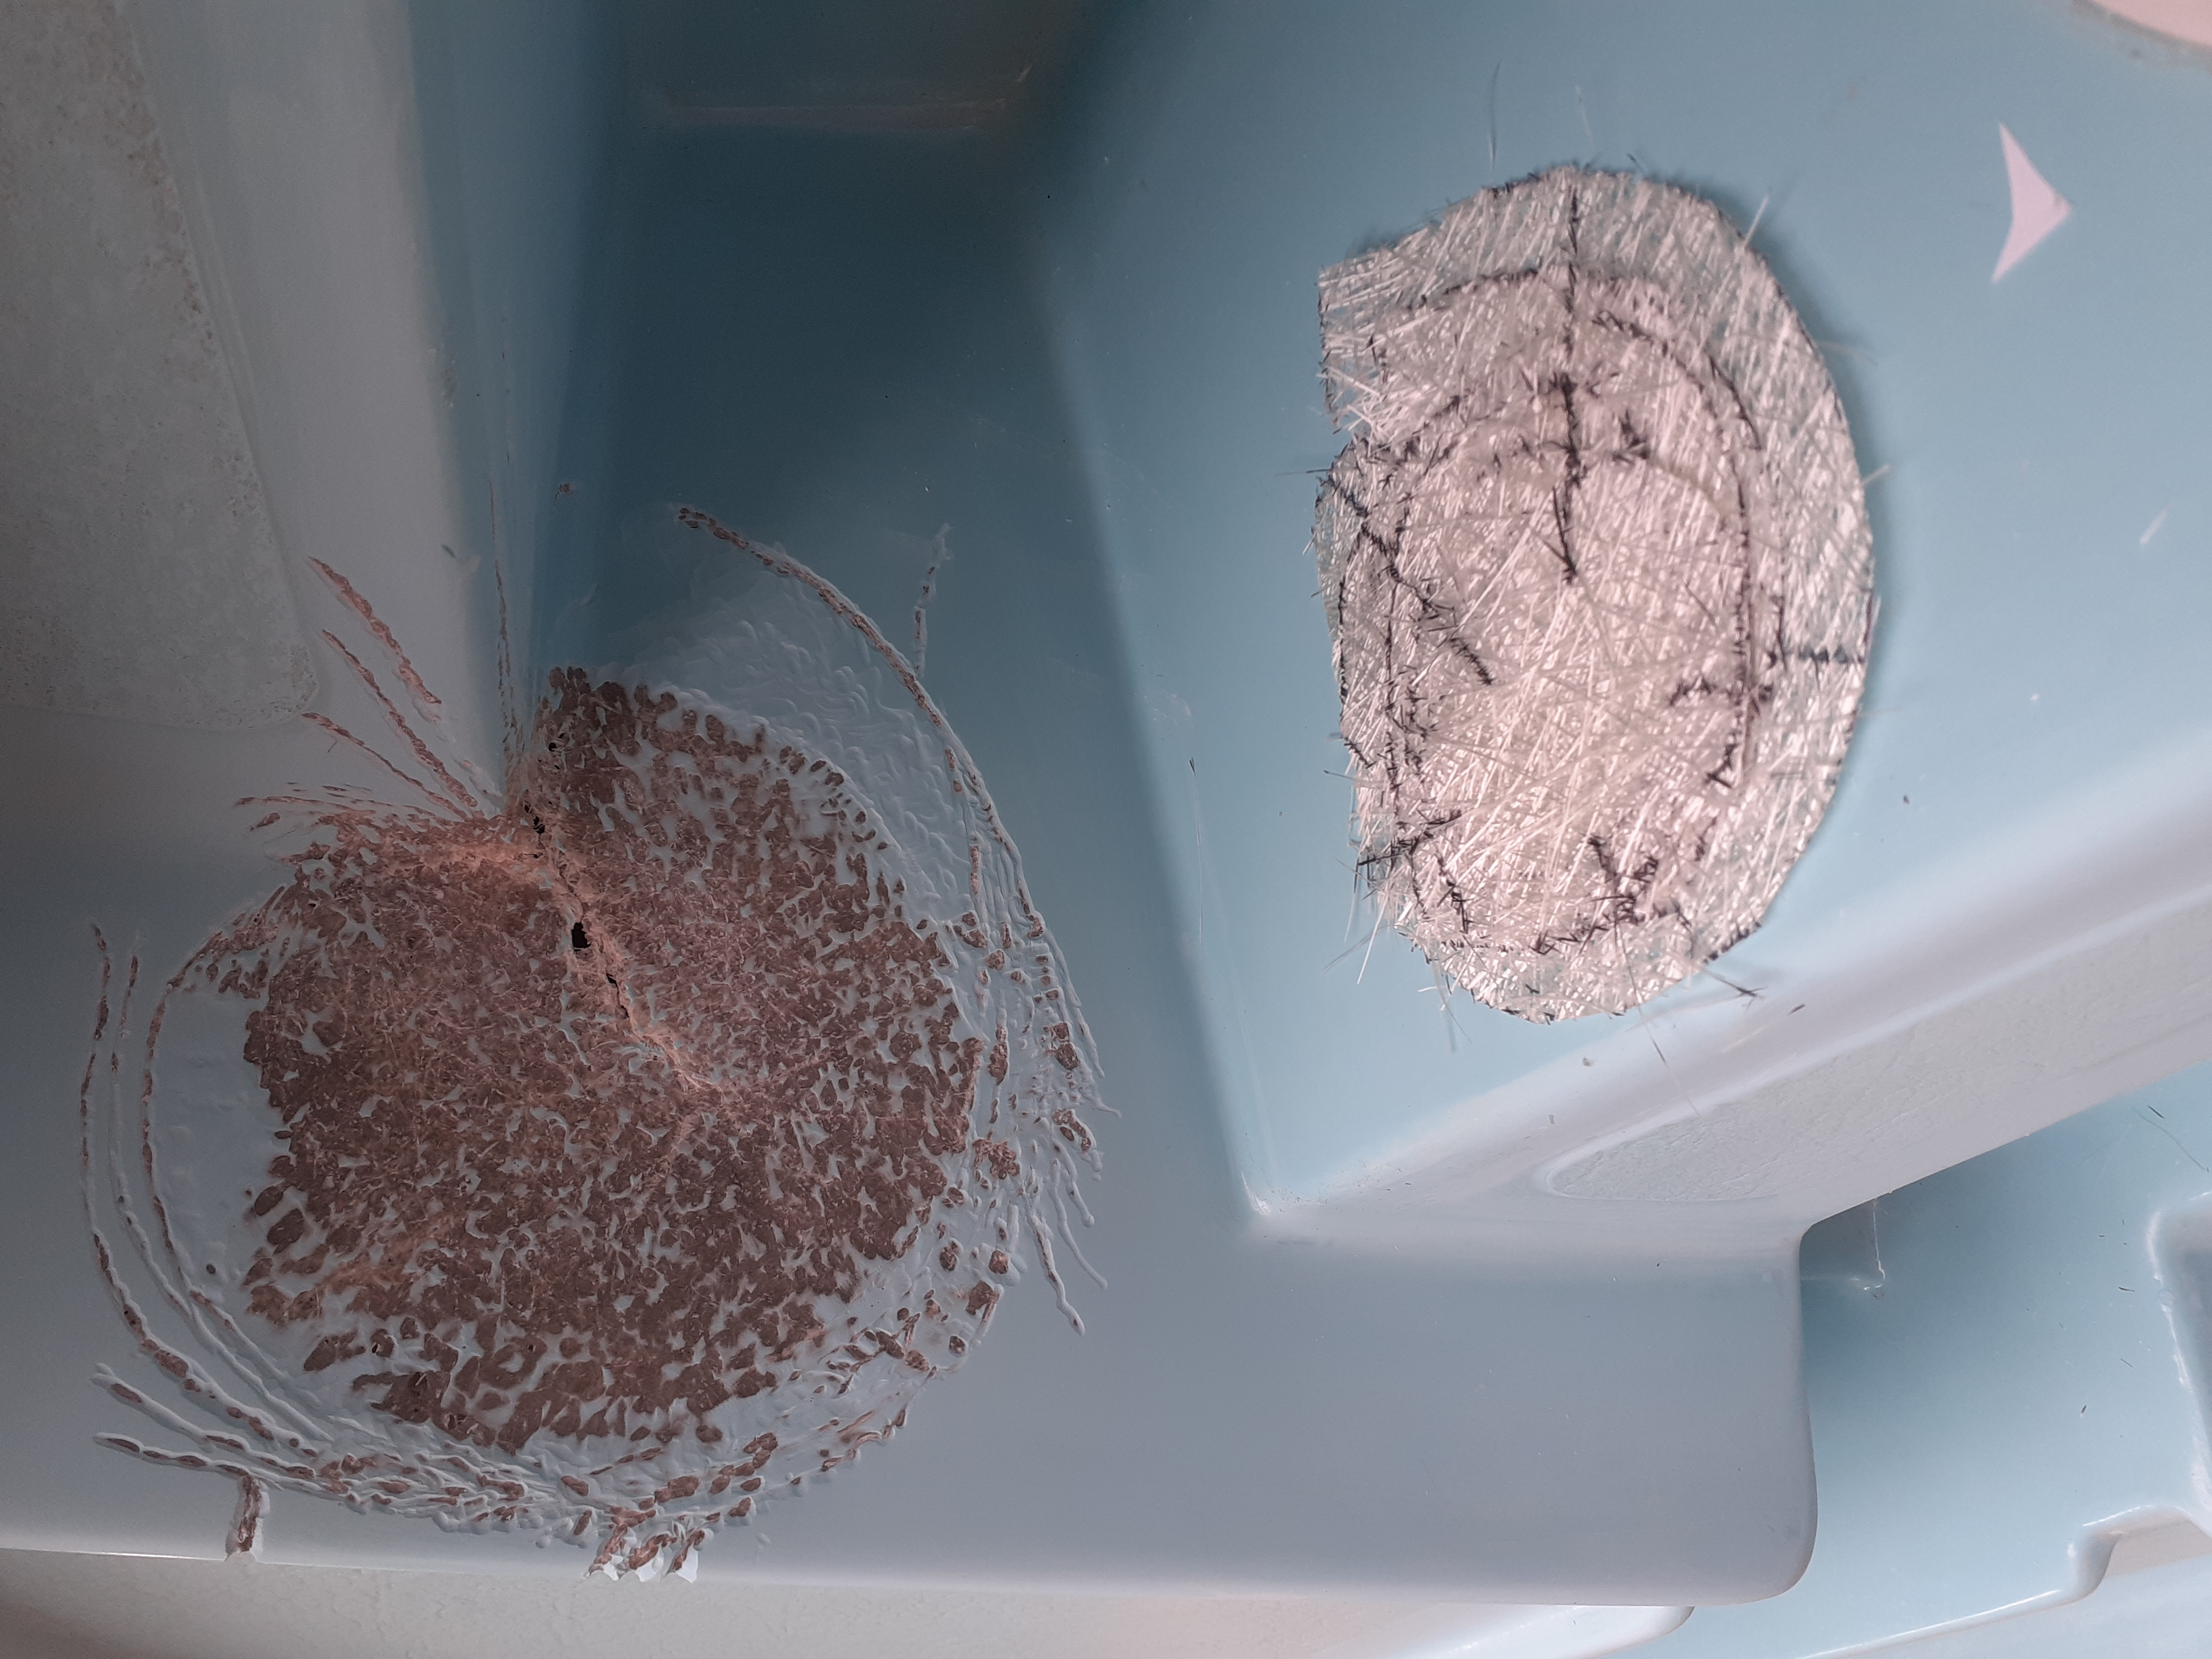

Here's a few pictures of the additional repairs I did to use the resin up.
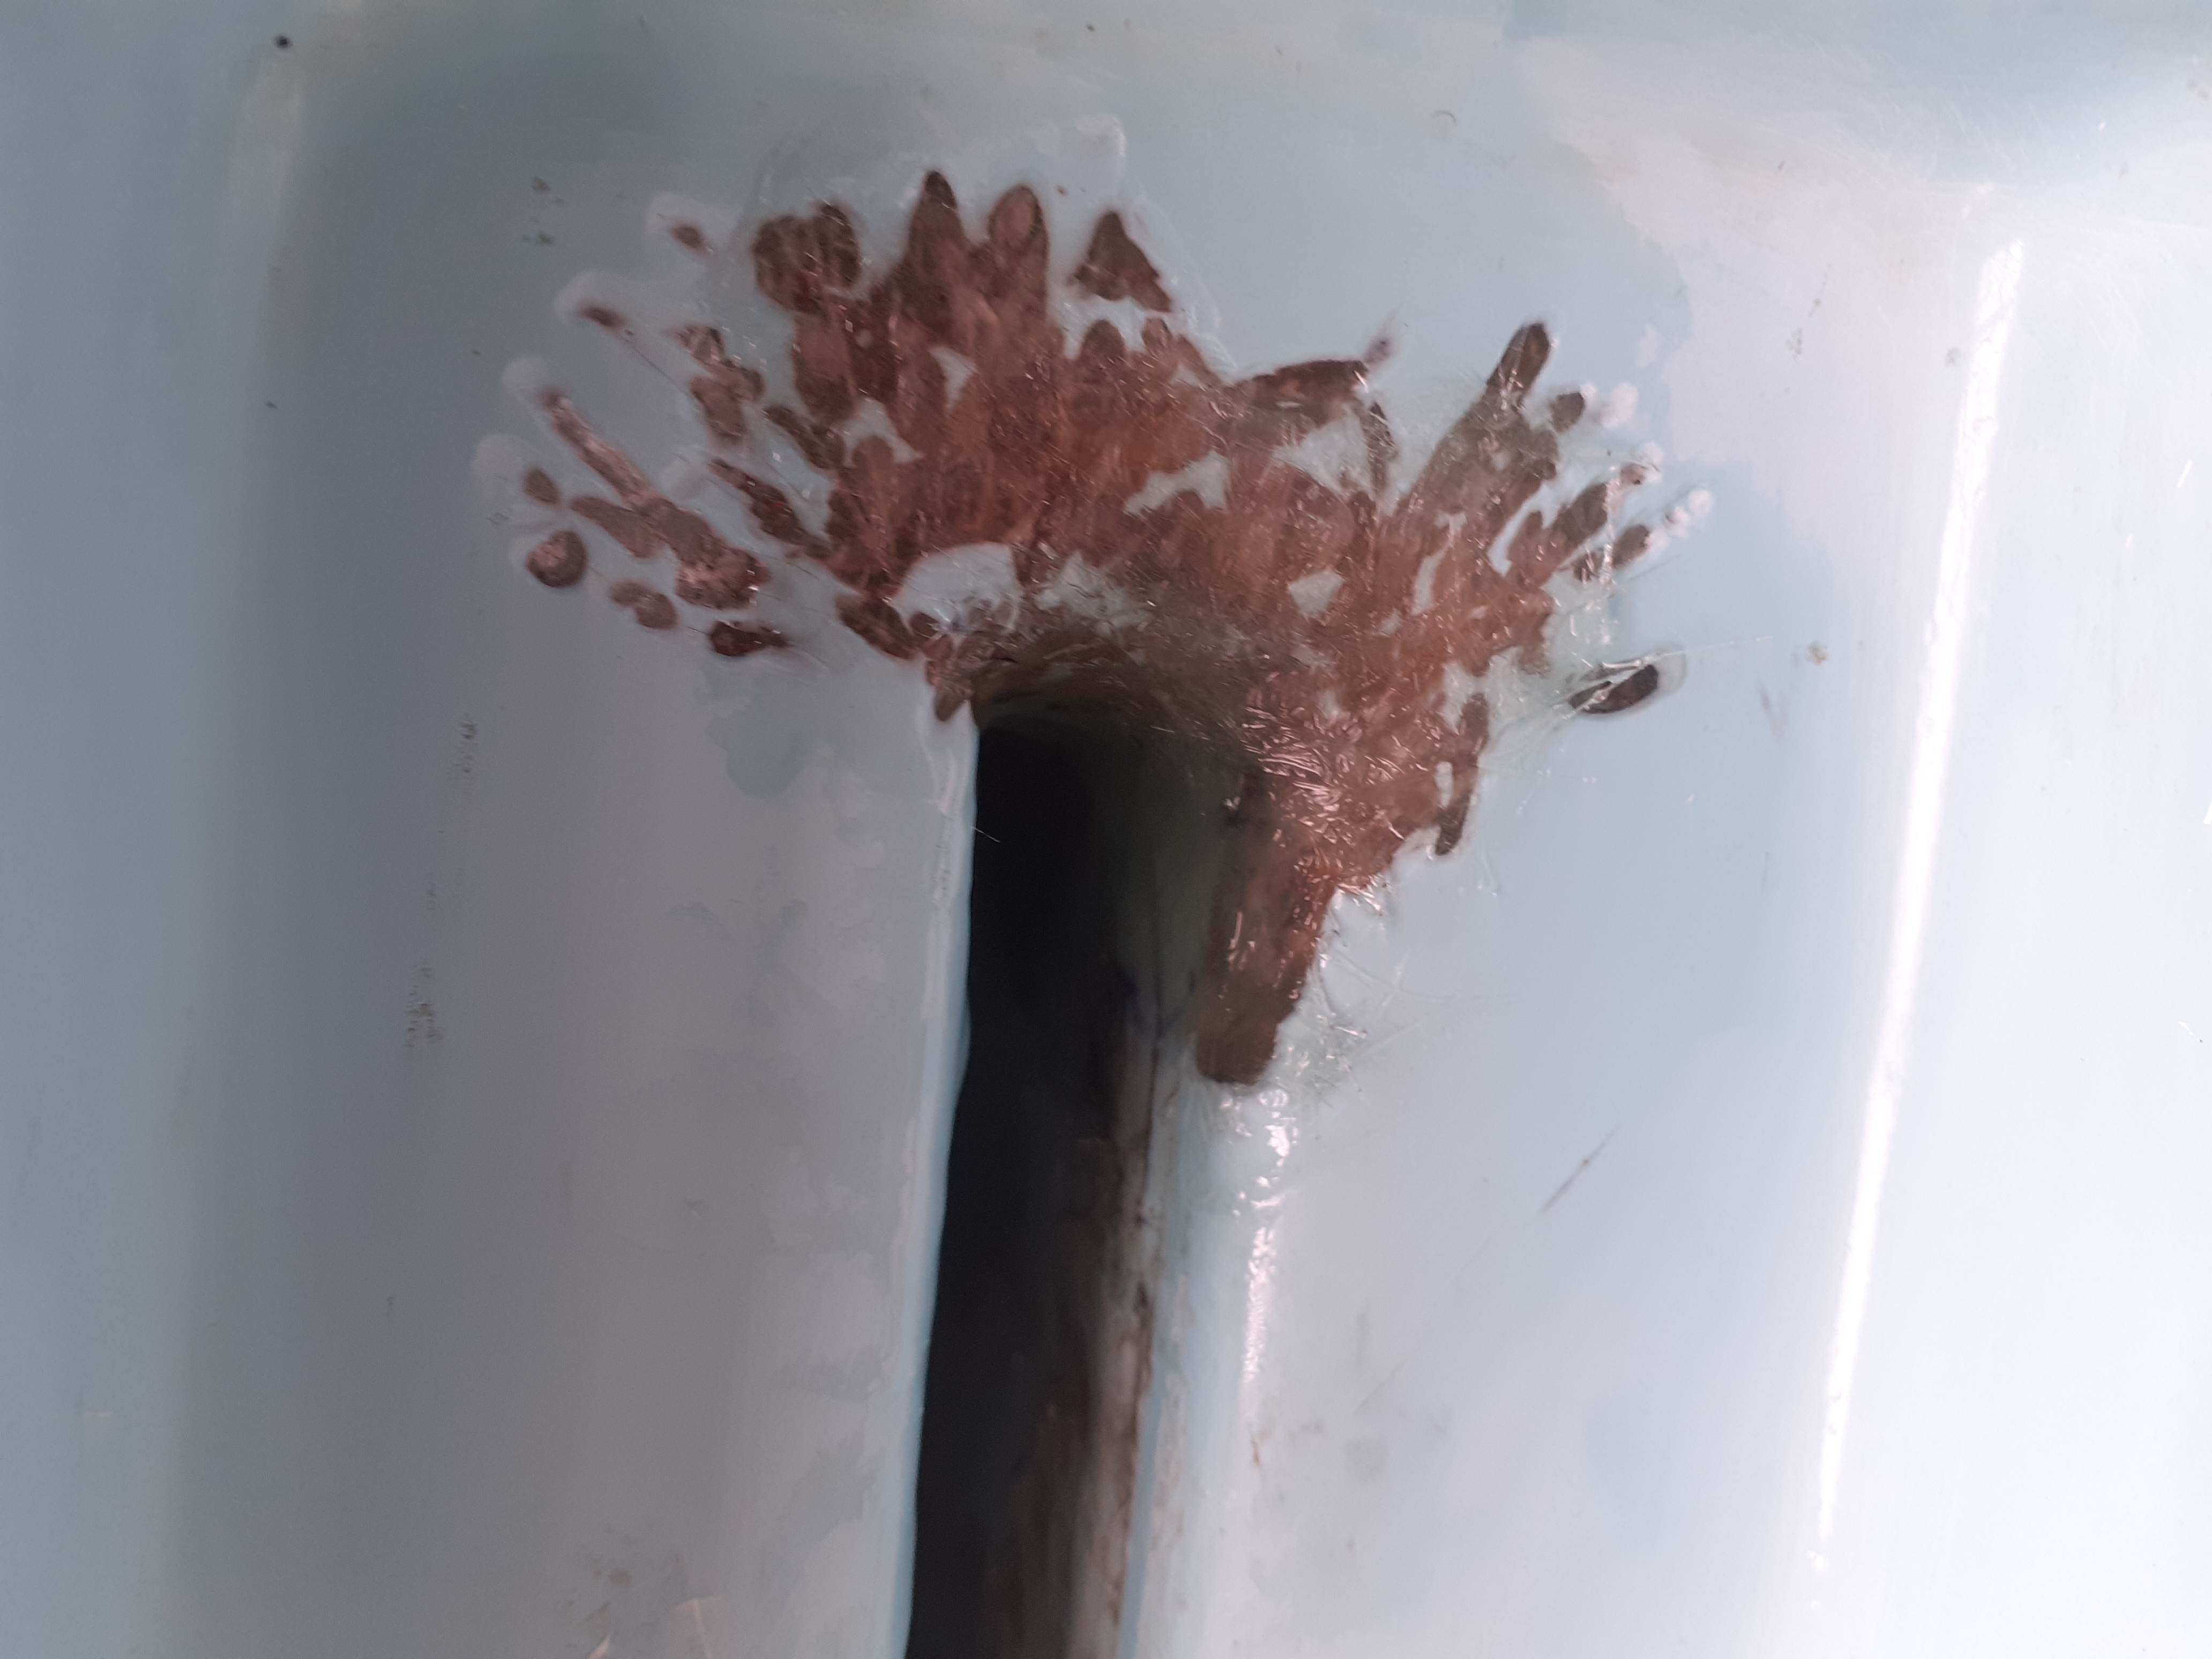
The mast step is tricky to decide what to do. I was originally planning on screwing a nut down so the load on the fibreglass would be spread over a wider area, but I opted against this because of the thickness of the nut and it has corners. Hopefully I made the right choice. It's a fairly narrow (m8 I think) threaded bolt poking through.
I had collected my offcuts of matting from the quirky shapes to patch, so I chopped these up into smaller pieces, then dumped the lot in my remaining resin (maybe 7ml). After pummelling this for a while with the paintbrush to wet it through, I pushed it all into the hole around the bolt. Really this is just to position the bolt in what I hope is the centre. To try and ensure the bolt is central to the boat, I tied a string around it and brought that up taught through the mast step and tied it off at the painter hole at the bow. I was then able to check the gap to either side of the line when viewed from the stern - it seemed okay.
The daggerboard slot front and rear I've reinforced with a few pieces of matting. I don't think it's going to be necessary since I plan to add a sacrificial plastic plate like the topper has, but, just in case...


Because it isn't warm, the fibreglass work was done in the shed with the doors open. After finishing, I closed the doors and I've put an electric heater on for half an hour to give it a boost before the shed is warmed by the sun a little later on.
Later today I'll check to see if confirm the resin has set okay. If it has I'll be able to add extra layers on mast step bolt to reinforce that bottom plate. I'm very tempted to add a well roughed up washer to the first layer to help ensure the load is dispersed.
I'm not clear why there is much load, but I guess on a gybe the act of the boom swinging across hard at the top side of the deck is transferred to the mast step via the deck like a lever.